The Ultimate Guide to Crafting Impressive 3D Walkthroughs
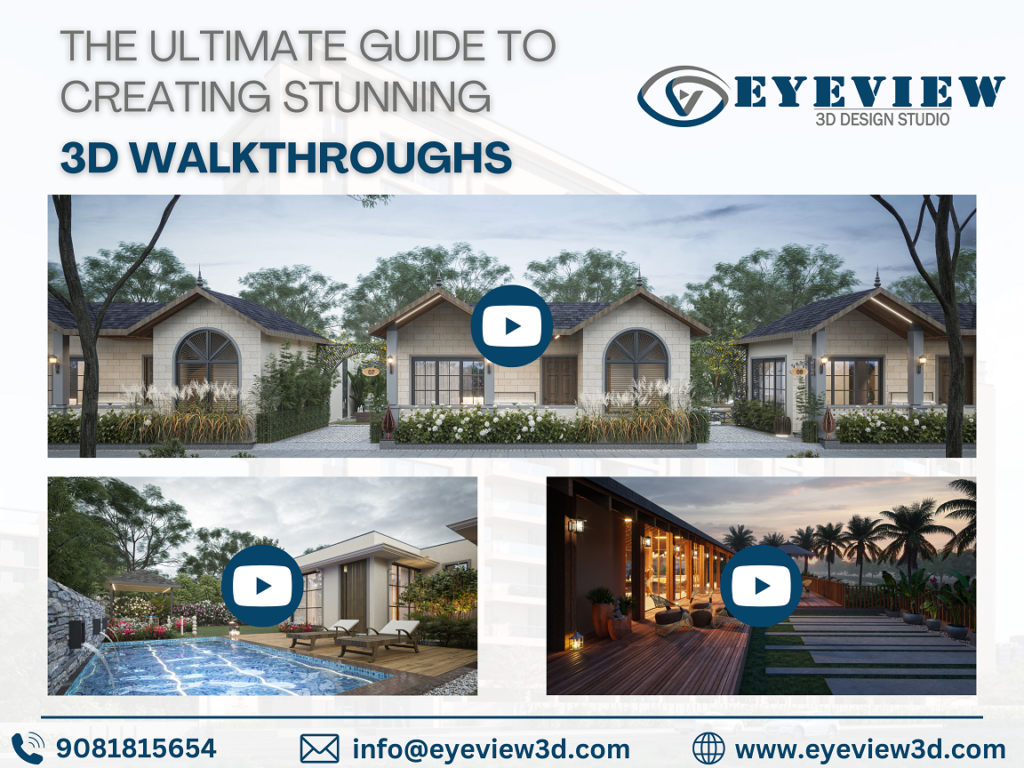
The Ultimate Guide to Creating Stunning 3D Walkthroughs offers expert insights into crafting immersive virtual experiences. It covers essential techniques, tools, and best practices for designing detailed, lifelike 3D environments. With the right approach, you can transform architectural designs and ideas into captivating interactive walkthroughs. Eyeview 3D Design Studio specializes in turning visions into reality, providing innovative 3D modeling and rendering services that bring your concepts to life with precision and flair.
Why are 3D Walkthroughs So Powerful?
Before diving into the creation process, let’s understand why 3D walkthroughs are essential:
- Enhanced Visualization: They provide a realistic, three-dimensional representation of a space, far surpassing the limitations of 2D blueprints or static images. This allows for a more intuitive understanding of scale, layout, and design.
- Improved Communication: They facilitate clear communication between architects, designers, clients, and stakeholders. By visualizing the final product, everyone can be on the same page, minimizing misunderstandings and costly revisions.
- Effective Marketing & Sales: For real estate, product launches, and other industries, 3D walkthroughs are powerful marketing tools. They create excitement, generate leads, and help potential customers envision themselves in the space or using the product.
- Early Issue Detection: By virtually “walking through” a design, potential flaws or areas for improvement can be identified and addressed early in the design process, saving time and resources.
- Increased Engagement: 3D walkthroughs are inherently engaging and captivating. They draw viewers in and create a memorable experience, leaving a lasting impression.
The 3D Walkthrough Creation Process: A Step-by-Step Guide
Step 1: Define Your Purpose and Audience
The first step in creating a stunning 3D walkthrough is understanding its purpose and target audience. Are you creating it for:
- A real estate listing?
- An architectural proposal?
- An interior design project?
Understanding the end goal will help you tailor the walkthrough to meet the specific needs of your audience. For instance, a real estate walkthrough should highlight key selling points like spaciousness and natural light, while an architectural walkthrough might focus on structural details.
Step 2: Choose the Right Software
The software you choose plays a critical role in the quality of your 3D walkthrough. Here are some popular options:
- Autodesk 3ds Max: Ideal for high-quality architectural visualization.
- SketchUp: User-friendly and great for quick modeling.
- Lumion: Excellent for rendering realistic environments.
- Unreal Engine: Perfect for creating interactive and photorealistic walkthroughs.
- Blender: A free, open-source option with robust features.
Select software that aligns with your project’s complexity, your skill level, and your budget.
Step 3: Start with a Detailed 3D Model
A stunning walkthrough begins with a detailed and accurate 3D model. Here’s how to approach it:
- Gather References: Use blueprints, sketches, or CAD drawings to ensure your model is precise.
- Model Key Elements: Focus on walls, floors, windows, and other structural components before adding furniture and decor.
- Maintain Scale and Proportions: Ensure every element is to scale for a realistic experience.
- Add Details: Include textures, lighting fixtures, and other design elements to make the model visually rich.
Step 4: Optimize Lighting
Lighting can make or break your 3D walkthrough. It sets the mood and highlights key features of the space. Follow these tips for effective lighting:
- Use Natural Lighting: Simulate daylight by incorporating sunlight and shadows.
- Add Artificial Lighting: Include fixtures like lamps, ceiling lights, and sconces to enhance realism.
- Experiment with Angles: Adjust the direction and intensity of light to create depth and drama.
- Avoid Overexposure: Ensure the lighting is balanced to prevent washed-out visuals.
Step 5: Incorporate Realistic Textures and Materials
High-quality textures and materials are essential for creating a lifelike experience. Here’s how to get it right:
- Use High-Resolution Textures: Ensure surfaces like wood, stone, and fabric look detailed.
- Apply Bump and Normal Maps: Add depth and realism by simulating surface irregularities.
- Match Materials to the Design: Use appropriate finishes that align with the project’s aesthetic.
Step 6: Add Motion and Interactivity
A dynamic walkthrough keeps viewers engaged. Consider these features:
- Camera Path Animation: Create smooth camera movements to guide viewers through the space.
- Interactive Elements: Allow users to click on objects for more details or to change design options.
- 360-Degree Views: Include panoramic views for an all-encompassing experience.
Step 7: Focus on Rendering
Rendering brings your 3D walkthrough to life. It’s where all your hard work culminates into a stunning visual presentation. Here are some rendering tips:
- Choose the Right Render Engine: Options like V-Ray, Corona, and Enscape can deliver photorealistic results.
- Optimize Settings: Adjust parameters like resolution, anti-aliasing, and lighting for the best output.
- Test Renders: Do quick previews to identify and fix any issues before finalizing.
- Be Patient: High-quality renders can take time, so plan accordingly.
Step 8: Edit and Enhance
Post-production is the final step to refine your 3D walkthrough. Use video editing software like Adobe Premiere Pro or DaVinci Resolve to:
- Add Background Music: Choose a track that complements the mood of the walkthrough.
- Include Annotations: Highlight key features with text or voiceovers.
- Adjust Colors: Fine-tune brightness, contrast, and saturation for a polished look.
- Incorporate Branding: Add your logo and contact information for a professional touch.
Software and Tools for Creating 3D Walkthroughs
A wide range of software and tools are available for creating 3D walkthroughs, catering to different skill levels and budgets:
- 3D Modeling Software: SketchUp, 3ds Max, Blender, Maya, Cinema 4D
- Rendering Engines: V-Ray, Corona Renderer, Octane Render, Arnold Renderer
- Animation Software: After Effects, Premiere Pro, Final Cut Pro
- Game Engines (for interactive walkthroughs): Unreal Engine, Unity
The Future of 3D Walkthroughs
The future of 3D walkthroughs is bright, with advancements in virtual reality (VR), augmented reality (AR), and real-time rendering pushing the boundaries of what’s possible. Interactive walkthroughs, personalized experiences, and photorealistic rendering are just some of the exciting developments shaping the future of this technology.
Eyeview 3D Architecture Design Studio in Andhra Pradesh including locations Visakhapatnam, Vijayawada, Guntur, Nellore, Kurnool, Kakinada, Rajamahendravaram, Kadapa, Mangalagiri-Tadepalli, Tirupati, Anantapuram, Ongole, Vizianagaram, Eluru, Proddatur, Nandyal, Adoni, Madanapalle, Machilipatnam, Tenali, Chittoor, Hindupur, Srikakulam, Bhimavaram, Tadepalligudem, Guntakal, Dharmavaram, Gudivada, Narasaraopet, Kadiri, Tadipatri, Chilakaluripet.
Eyeview 3D Architecture Design Studio in Portugal Including Locations Lisbon, Porto, Vila Nova de Gaia, Braga, Coimbra, Funchal, Setúbal, Almada, Aveiro, Guimarães, Faro, Évora, Viseu, Leiria, Matosinhos, Loures, Sintra, Cascais, and Viana do Castelo.
Conclusion:
The Ultimate Guide to Creating Stunning 3D Walkthroughs provides you with all the essential tools and techniques to bring your designs to life. By mastering 3D modeling, animation, and rendering, you can create immersive, visually striking experiences for your audience. Trust Eyeview 3D Design Studio to help you elevate your projects with cutting-edge technology and expertise, ensuring your 3D walkthroughs make a lasting impression.
View More: Click Here

